5 OBS Studio Tips

For streamers and content creators, OBS Studio has become an indispensable tool for producing high-quality video content. As a free and open-source software, OBS Studio offers a wide range of features and customization options that can help users take their streaming and recording to the next level. With its flexibility and versatility, OBS Studio has become the go-to choice for many professionals and hobbyists alike. In this article, we will delve into five expert-level tips for getting the most out of OBS Studio, covering topics such as scene management, audio settings, and advanced features.
Key Points
- Mastering scene management for seamless transitions
- Optimizing audio settings for professional-grade sound
- Utilizing advanced features such as chroma keying and color correction
- Customizing OBS Studio with plugins and scripts
- Improving performance and reducing lag with optimized settings
Scene Management and Transitions

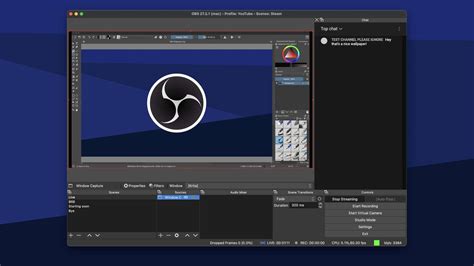
One of the most powerful features of OBS Studio is its scene management system. By organizing your stream or recording into separate scenes, you can create seamless transitions between different segments, such as switching from a gameplay scene to a chat scene. To take full advantage of this feature, it’s essential to understand how to set up and manage your scenes effectively. This includes creating separate scenes for different parts of your stream, using scene transitions to switch between them, and customizing your scene settings to achieve the desired look and feel.
For example, you can create a scene for your gameplay footage, another for your chat overlay, and a third for your stream's intro or outro. By using scene transitions, you can switch between these scenes smoothly, creating a professional-looking stream. Additionally, you can customize your scene settings to include or exclude specific sources, such as your webcam or microphone, depending on the scene.
Setting Up Scenes and Transitions
To set up scenes and transitions in OBS Studio, follow these steps:
- Create a new scene by clicking the “+” button in the scenes panel
- Add sources to your scene, such as your gameplay footage or chat overlay
- Customize your scene settings, such as the resolution, framerate, and bitrate
- Set up scene transitions by clicking the “Transition” button in the scenes panel
- Choose a transition type, such as a fade or swipe, and customize its settings
| Scene Setting | Recommended Value |
|---|---|
| Resolution | 1080p (1920x1080) |
| Framerate | 60fps |
| Bitrate | 4500 kbps |

Audio Settings and Optimization

High-quality audio is just as important as high-quality video when it comes to streaming and recording. OBS Studio offers a range of audio settings and features that can help you optimize your audio for the best possible sound. This includes setting up multiple audio devices, such as a microphone and headphones, and customizing your audio settings to reduce echo, noise, and other audio issues.
For example, you can use the "Noise Suppression" filter to reduce background noise and the "Noise Gate" filter to eliminate echo and other audio artifacts. Additionally, you can customize your audio settings to include or exclude specific audio sources, such as your microphone or system audio, depending on the scene.
Setting Up Audio Devices and Filters
To set up audio devices and filters in OBS Studio, follow these steps:
- Connect your audio devices, such as your microphone and headphones
- Configure your audio settings, such as the sample rate and bitrate
- Add audio filters, such as noise suppression or noise gate, to your audio sources
- Customize your audio filter settings, such as the threshold and ratio
Advanced Features and Customization
OBS Studio offers a range of advanced features and customization options that can help you take your streaming and recording to the next level. This includes features such as chroma keying, color correction, and custom plugins and scripts. By utilizing these features, you can create a unique and professional-looking stream that stands out from the crowd.
For example, you can use chroma keying to remove the background from your webcam footage and replace it with a custom background. Additionally, you can use color correction to adjust the color and brightness of your video footage to achieve a consistent look and feel.
Using Chroma Keying and Color Correction
To use chroma keying and color correction in OBS Studio, follow these steps:
- Set up a chroma keying filter on your webcam source
- Customize your chroma keying settings, such as the key color and threshold
- Add a color correction filter to your video source
- Customize your color correction settings, such as the brightness and contrast
| Filter Setting | Recommended Value |
|---|---|
| Key Color | Green (0, 255, 0) |
| Threshold | 0.5 |
| Brightness | 50% |
| Contrast | 100% |
Customizing OBS Studio with Plugins and Scripts
OBS Studio offers a range of plugins and scripts that can help you customize your streaming and recording experience. These plugins and scripts can add new features and functionality to OBS Studio, such as custom overlays, animations, and effects. By utilizing these plugins and scripts, you can create a unique and professional-looking stream that stands out from the crowd.
For example, you can use the "Streamlabs" plugin to add custom overlays and animations to your stream. Additionally, you can use the "OBS.Live" script to add custom effects and transitions to your stream.
Installing and Configuring Plugins and Scripts
To install and configure plugins and scripts in OBS Studio, follow these steps:
- Download and install the plugin or script from the OBS Studio website
- Configure the plugin or script settings, such as the overlay or animation
- Test the plugin or script to ensure it is working correctly
What is the best way to optimize my OBS Studio settings for streaming?
+The best way to optimize your OBS Studio settings for streaming is to experiment with different settings and configurations to find what works best for your specific use case. This includes adjusting your bitrate, resolution, and framerate, as well as customizing your audio and video settings.
How do I set up a custom overlay in OBS Studio?
+To set up a custom overlay in OBS Studio, you can use a plugin such as Streamlabs or create your own custom overlay using a graphics editing software. You can then add the overlay to your stream by clicking the "+" button in the sources panel and selecting "Image" or "Video Capture Device" depending on the type of overlay you are using.
What is the difference between a scene and a source in OBS Studio?
+A scene in OBS Studio is a collection of sources, such as video and audio, that are used to create a specific layout or composition. A source, on the other hand, is an individual element, such as a webcam or microphone, that is added to a scene. By organizing your sources into scenes, you can create complex and dynamic layouts that can be easily switched between during your stream.
In conclusion, OBS Studio is a powerful and versatile software that offers a wide range of features and customization options for streaming and recording. By mastering scene management, optimizing audio settings, and utilizing advanced features and customization options, you can take your streaming and recording to the next level and create high-quality content that engages and entertains your audience. Whether you’re a professional streamer or just starting out, OBS Studio has the tools and features you need to succeed.


